
There are a few things in life that feel instantly luxurious with almost no effort, and unbelievably minimal ingredients, and this lavender honey is firmly at the top of that list. It’s the kind of thing you drizzle over a wedge of cheese, and suddenly everyone thinks you’ve “elevated the moment,” when really…you warmed honey and tossed in some flowers. We love a low-effort glow-up.
When done right, lavender honey is a revelation. Done right, it’s glossy, golden, and carries a subtle, aromatic complexity that feels sophisticated. Done wrong, it tastes like your grandmother’s soap drawer. I know some people are hesitant about floral flavors because they’re afraid it’ll taste like eating a bar of soap, but the secret is all in temperature control. Honey is delicate, lavender even more so, and neither of them wants to be bullied on the stove. We aren’t cooking the lavender; we are gently coaxing those delicate oils into the honey. It shouldn’t be medicinal—it should be a soft, floral hug for your taste buds.
I’ve mapped out two paths for you today. Each of the two methods below differ in their intensity and time commitment. The quick method (20–30 minutes total, including cooling) produces a bright, lighter lavender note ideal for everyday drizzling. The long infusion method (2 hours minimum, up to overnight) yields a deeper, more pronounced floral flavor with greater complexity. Both methods use the same ingredients and equipment; only the timing differs.
If you’re in a rush to assemble a cheeseboard for tonight, the quick method gives you a bright, light floral note in about 20 minutes. But, if you’re like me and love a project that develops while you sleep, the long infusion method (letting it steep overnight) yields a deeper, more soulful flavor.
The critical rule for both methods is the same: do not boil or simmer the honey with lavender. Prolonged exposure to high heat breaks down lavender’s delicate aromatic compounds, producing a bitter, medicinal, or ‘soapy’ taste. The honey only needs to be warm enough to loosen and infuse — not cooked.
Why you’ll love this recipe
- The Ultimate Beginner-Friendly Recipe: This lavender honey syrup is surprisingly a 2-ingredient wonder. No fancy tools, no professional techniques. Just you, a saucepan, and a little patience. It’s a gourmet result with “zero-skill” effort.
- Elevated Flavor Profile: The natural sweetness of honey pairs well with lavender’s floral notes. It transforms standard tea, pastries, and baked goods into something truly artisanal.
- The Perfect Homemade Gift: If you want to be the person who gives the best holiday or housewarming gifts, look no further. Package this in a pretty glass jar with a decorative bow and maybe a wooden honey wand. This lavender infused honey is thoughtful, beautiful, and tastes like a luxury boutique find.
- A Natural Powerhouse: Beyond the taste, this homemade lavender honey is packed with vitamins and free amino acids. It’s particularly high in Tyrosine compared to other varieties and typically has a lower pollen content, making it a friendlier option for those with mild pollen sensitivities.
Tips that matter
The Golden Ratio: For a subtle background note, stick to 2 tablespoons of lavender per 12–16 oz jar. If you want that floral flavor to be the absolute star, bump it up to 3 tablespoons.
Color vs. Flavor: Darker purple lavender buds will give your honey a slightly richer tint, but don’t be fooled—light pink varieties can taste just as incredible. Trust your nose: if it smells fragrant and pleasant, it’s good to go.
The “Patience” Payoff: Both methods produce honey that actually improves with age. The flavor settles and integrates over 24–48 hours, so if it tastes a little “sharp” right after straining, give it a day to mellow out.
Crystallization is Normal: If your DIY lavender honey gets cloudy or solidifies over time, don’t toss it! According to the USDA, it’s a natural process, not a safety issue. Just gently warm the jar in a bowl of warm water to bring it back to its liquid, glossy glory.
Scaling Up: This lavender honey recipe scales perfectly. Making gifts for the whole neighborhood? Just double the honey and double the lavender.
Substitutions & swaps
- The Honey: Use a mild-tasting, light-colored honey so it doesn’t compete with the lavender. Raw, unfiltered honey offers the best depth, and standard Clover honey is a great, reliable base. Avoid dark, aggressive honeys like Buckwheat or Manuka here, they’ll drown out the floral notes.
- The Lavender: You must use “Culinary Grade” dried lavender. This isn’t just a suggestion! Lavender meant for sachets or candles can be treated with chemicals and contain high oil levels, which can make it taste bitter. Culinary lavender is bred for a sweeter, more palatable flavor.
What to serve this with
- For the Quick Method (Light & Fresh): This version is my go-to for everyday drizzling. It’s incredible over a bowl of Greek yogurt with walnuts, stirred into a bright salad dressing with lemon and Dijon, or brushed onto fresh roasted figs.
- For the Long Infusion (Deep & Complex): Because this version has more “oomph,” it pairs beautifully with rich foods. Think of a decadent cheeseboard with sharp goat cheese or creamy brie, drizzled over vanilla bean ice cream, or as a floral sweetener for a sophisticated gin cocktail.
Storage
Store at room temperature in a sealed jar — honey does not require refrigeration.
Always keep moisture out. Even a small amount of water introduced via a wet spoon can trigger fermentation. Always use a clean, dry spoon.
Properly stored lavender honey will keep for 1 to 2 years, though flavor is best within the first 6 months.
If the honey crystallizes over time, gently rewarm the jar in a bowl of warm water to re-liquify. Do not microwave.
Label your jar with the date and lavender amount used. It’s helpful for replicating your preferred batch.
Common mistakes & how to avoid them
- The “Soapy” Aftertaste: If your honey tastes bitter or soapy, you likely overheated it. High heat breaks down lavender into harsh compounds. Unfortunately, this batch cannot be fully corrected. Next time, be much more aggressive about removing the pan from the heat before adding the lavender. If a batch is too strong, try mixing it 50/50 with plain honey to save it!
- The “Invisible” Lavender Flavor: If you can barely taste the lavender, your lavender buds might be old and have lost their potency (dried herbs lose aromatics over time), or the steep was too short. Ensure you’re using fresh culinary lavender, and don’t be afraid to let it sit for the full 12 hours.
- Straining Struggle: Honey is a pain to strain when it’s cold and thick. Simply rewarm the mixture slightly (95–100°F) right before straining. It will glide through the sieve like a dream.
Lavender Honey

Ingredients
- 1 12–16 oz full container honey Raw, unfiltered honey is ideal for depth of flavor; commercial clover honey works fine; avoid strongly flavored honeys like buckwheat, which compete with the lavender
- 1/4 cup Culinary dried lavender must be labeled ‘culinary grade’ or ‘food safe’; do not use lavender meant for sachets, candles, or potpourri
Equipment
- Small saucepan
- Fine mesh sieve or cheesecloth
- Clean glass jar with lid (mason jar or the original honey jar, rinsed)
- Silicone spatula or wooden spoon
- Instant-read or candy thermometer (helpful but not required)
Directions
QUICK METHOD — 20 TO 30 MINUTES
- Use this method when you need lavender honey the same day or prefer a lighter floral note. The honey will taste fresh and bright, with lavender as a background flavor rather than the star.
Loosen the Honey
- If your honey is very thick or crystallized, place the sealed jar (with lid loosened by one turn) in a bowl of hot tap water for 5–10 minutes to loosen it before pouring. This is a convenience step only and is not strictly necessary if your honey pours freely.
Warm the Honey
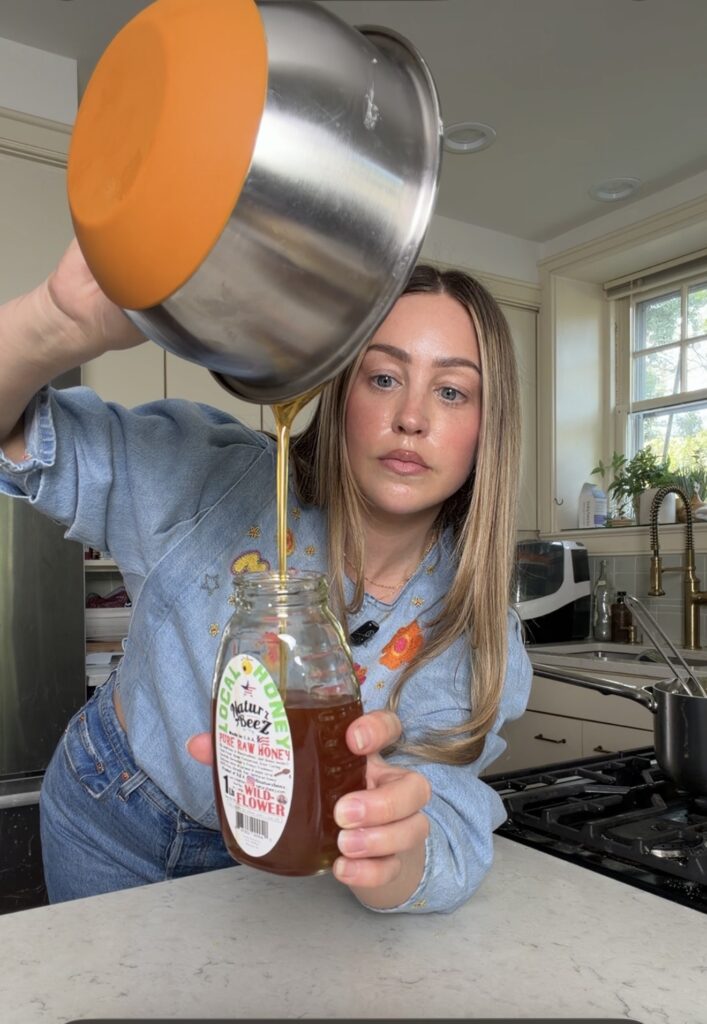
- Pour the honey into a small saucepan. Warm over low heat, stirring occasionally, for 2–3 minutes until the honey is loose, glossy, and pourable. You are aiming for approximately 100–110°F — warm to the touch but not hot. If you have a thermometer, do not exceed 120°F at this stage. Do not let it simmer, bubble, or steam.
Add Lavender and Infuse
- Remove the pan from heat entirely. Stir in the dried lavender. Let sit undisturbed for 15–20 minutes. The honey will cool slightly and the lavender will begin releasing its oils. Taste at 15 minutes — if the flavor is where you want it, proceed to straining. For a slightly stronger result, wait the full 20 minutes.
Strain
- Pour the honey through a fine mesh sieve into a clean jar, pressing gently on the lavender with a spoon to release any honey trapped in the buds. Discard the strained lavender. Let the honey cool to room temperature before sealing the jar — about 20–30 minutes on the counter.
Result
- A bright, lightly floral honey. Lavender is present but gentle. Well-suited for everyday drizzling, baking, or pairing with mild cheese.
LONG INFUSION METHOD — 2 HOURS TO OVERNIGHT
- Use this method when you want a richer, more pronounced lavender flavor, or when making a batch to keep on hand. The extended steep time allows the essential oils to fully dissolve into the honey, producing a deeper, more complex result that improves slightly over the following 1–2 days as the flavor continues to mellow and integrate.
Loosen the Honey
- Same as the Quick Method: if the honey is thick or crystallized, place the sealed jar (lid loosened) in hot tap water for 5–10 minutes before pouring.
Warm the Honey
- Pour honey into a small saucepan. Warm over the lowest possible heat for 2–3 minutes, stirring, until just loose and pourable — approximately 95–110°F. The goal is simply to make the honey fluid enough to fully surround the lavender. Remove from heat as soon as it is pourable.
Add Lavender
- Stir in the dried lavender off the heat. Give it a thorough stir to ensure all lavender is submerged and coated in honey.
Long Steep
- Allow the mixture to sit at room temperature, uncovered or loosely covered with a clean cloth, for a minimum of 2 hours. For the fullest, most developed flavor, steep overnight — 8 to 12 hours is ideal. The honey will cool to room temperature and thicken back up; this is normal and does not affect the infusion. Taste at 2 hours and again before straining to gauge intensity.
- Optional warm re-infusion: If you want to push the flavor further without extending the time, you can gently rewarm the honey (without the lavender) to about 100°F after the initial steep, then let it cool again. This slightly accelerates extraction. Do not reheat with the lavender already in it beyond 110°F.
Strain
- When the flavor is where you want it, pour through a fine mesh sieve or cheesecloth into a clean jar, pressing on the lavender to extract as much honey as possible. Discard the spent lavender. Allow honey to cool completely — at least 30 minutes — before sealing.
Result
- A deeply floral, complex honey with a noticeable lavender character. The flavor will be pronounced immediately after straining and will mellow very slightly over the first 24–48 hours as the aromatic compounds settle. Well-suited for cheese boards, drizzling over desserts, stirring into tea, or as a gift.


Rate & Review
WHAT DID YOU THINK OF THIS RECIPE?